Cornell Lab Barred Owl Bird Cam

For any with avian voyeuristic tendencies, Cornell Lab of Ornithology has several web cams to satisfy your curiosity and enhance your understanding of bird behavior for both feeding and nesting.  I have been enamored, particularly with the barred owl cam as we have barred owls in my woods.

Owlet Pair sharing together time with Mom in NestBox
So while I see the male hunting and hooting (and her anwering from deep in the woods),  I have not yet figured out their nest location. But we've had them for years, and they are lovely (if not startling) to see flying at dusk and early morning.  The barred owl cam, though, gives me a vicarious experience of watching the Indiana barred owls.  It is hosted by the owner of Wild Birds Unlimited. 

The camera set up is first rate:  an interior camera and an exterior camera--both high definition. They use an infra red light inside the box so that you can see what's what even at night. I caught the owls toward the end of her brooding her eggs--two of them.  I also so the first hole where the great escape was to take place.  The first owlet hatched and the very next day the second one emerged.

In the space of just two weeks, viewers have been treated to the careful tending of the mother to the chicks.  They went from looking like cotton balls to now having their feathers coming out and reflecting the lovely pattern characteristic of barred owls.  I feel like they are part of my family!

I note that watching is not for the faint-hearted.  These birds are predatory; all manner of prey--snakes, frogs, baby rabbits, fish, mice, crayfish--are brought to these hungy lungries.  They bring a whole new meaning to eat, sleep, prey!(sic)   Though watching the loss of one life to feed another can be upsetting to some, the animal world is eat or be eaten.  It is the balance of life, and you can see that NOTHING goes to waste.  Food is stockpiled like you would have a pantry.  If the owlets are sleeping when the prey arrives, it is deposited in the box.

IN the beginning, the mother would have to feed the owlets by tearing up the prey and carefully offering it to the little ones.  NOw....GULP.  They snarf down the food (head first).  When you see how much they eat, you realize that the parents (as any avian parent) has to work pretty hard to keep the bellies full.  The female is now hunting, but for almost a month, it was the male who was feeding first the female as she at on the eggs, and then the three of three of them.  The hen has to stay with the nestlings until they can regulate their body temperature.

If you are interested in the process, I hope that you will click on the link.  Also consider supporting the great work doen by the Cornell Lab of Ornithology.

Bluebirds, Season Two

Last year was our first season of having Bluebirds.  We had 5-6 Bluebirds actively winter with us this year.  Within the last couple of weeks, I now just have a mating pair, as the others in the small flock have likely moved on to their chosen nesting areas. I put out suet and live mealworms for them, whistling each time.  They are attuned to the sliding glass door opening, the whistling and the clang I make against the mealworm dish. Sometimes my customers are waiting on the deck rail prior to getting any auditory cues that a meal is coming. It is lovely to see in the morning.

My customers for suet and mealworms are not just the Bluebirds.  This year, for the first time, I noticed the cardinals eating both suet and mealworms...though for the latter, their interest in them did not appear until recently.  I have a smallish flock of about 8 or so cardinals that have over-wintered in my backyard.  Other  visitors have included Yellow Bellied sapsucker, Red bellied Woodpecker, Hermit Thrush, Brown Creeper, Tufted Titmouse, Carolina Chickadee, White Breasted Nuthatch, Red Breasted Nuthatch (who gone for about a month now heading toward breeding areas) Carolina Wren, Dark Eyed Juncos, White Throated Sparrows, Goldfinches, Pine Warbler and House/Purple finches.  Oh...and squirrels and noctornal visitors opossums and racoons.  I don't wish to feed any of that trio and bring in the suet vending machine.

When the weather was warm for a few days in late February, I saw the female Bluebird with nesting materials in her mouth and activity at the nest box.  Then real February weather kicked in, and I noted no further activity.  It was clear that in late February, birds had paired up for Spring mating.  Where visitors were singular to the feeding stations, I noticed that they had paired up. Where it is difficult to see one Pileated Woodpecker, I saw a pair flitting about in the oak trees--making raucus noise.  Same to be said for the Red-bellied (who have excavated a cavity in a dead branch outcrop of a White Oak, Carolina Wren, White-breasted Nuthatch and the Tufted Titmouse.  What is really touching is to see the males offering mealworms to their females.

Two days ago, I noted that the male Bluebird had a beak full of mealworms and flew to the box.  Was it possible that eggs had been laid and hatched and I missed it?  I whistled on my way to the box with my step ladder and screw driver to unfasten top of the box to peek in.  I tapped on the box several times to give the female a chance to leave if she was in there.  When I opened the box, the female was quietly sitting on the nest.  I could not observe either eggs or young.

Did you know?  Birds typically lay their eggs in the morning.  So if you you are monitoring a nest, you should do it after noon time to give the hen a chance to lay her egg (it is a process).  Egg laying is a serialized event...one a day until the clutch is done.
I went back yesterday after I observed the hen off her nest (and eating mealworms I had offered).  Her nest had 4 eggs.  I'll check again this afternoon to see if there is a 5th one.  If not, I have a starting point for monitoring the nest.  I monitor the nest through Cornell's NestWatch and I also participated in Project Feeder Watch this year.  Both offer a great way to systematize your observations and reporting of bird activity.

Birds

Winter is in full swing, and our bird population at our house has grown.  In addition to our black oil, I put out homemade suet and sunflower chips.  Changing up the food, which I began last year with my reformulated suet, has brought some interesting birds into our viewing. It's a conscious act of observing, and by doing so, one 'sees'.

A more systematize way of seeing the birds is by participating in the Cornell Lab of Ornithology's Project Feeder Watch (you can visit here https://feederwatch.org/) which begins the first week of November annually.  It's a weekly count of birds at feeders in your back yard.  You observe the highest count of a species seen simultaneously at your feeder over the two day period.  It's a great project to get you focused on your back yard visitors.  I have a feeder just outside of a large west window, so it is easy to take a look and see who is who and what is what.  And by doing so, there is so much to see!


Another systematic way to see and report is using Cornell's free E-Bird Application.  It is a simple phone app that allows you to enter your birdwatching data for any slice of time that you are interested in doing so.

Finally, the Great Backyard Birdcount is taking place on February 15-18.  Why not consider participating?  http://gbbc.birdcount.org/

Our weather has turned particularly cold.  The suet is a huge hit for all of the birds.  This year is the first year that I've seen the cardinals eating it.  This winter, I've noticed three birds that I've not seen before:  Yellow-bellied sapscuker, Brown Creeper and Pine Warbler.  I've lots of Juncos, Goldfinches, Cardinals and a whole camp of white throated sparrows.  In addition to seeing the old friends, it is always a delight to see some new ones.  Hopefully you will see some too!

More on Mealworms

I wrote earlier about my mite infestation here and here.   So far my containment strategies are working.  Though my mite infestation continues, it is in a self-contained universe. And the process of taking worms out of a contaminated bin, rinsing them off, and blotting them on paper towels and rehoming to the mite-free bin is working just fine.  I undertook this study because I was unwilling to throw out my initial colony which took a bit of time to cultivate.  I'm glad that I went down this path, because I have lots of larvae.

One modification to my initial strategy is that I made to the most contaminated bin was to use a moat strategy (which I read about elsewhere).  This ensured that the eggs and tiny larva could develop (I've noticed no deleterious effects from the mites on the worms) while keeping the mites quarantined.  To use  this strategy, simply put a container within a larger container fille with water.  Change the water weekly.

In beginning this process, I had my first beetle 05/09/2018.  My original beetle bin is now just down to a fraction of the original size.  As this bin was infested (and still is), I keep it separate.  No new beetles are added to this bin, and once they die, the bedding (with eggs) will go to the moat bin.

My larger bin of worms has mites, but it is not an overwhelming infestation.  I harvest from this bin as well as wash/dry worms and rehome for the mite-free bin so they can move through their life stage. This bin has a large population of larvae (tiny - large). 

I wanted to share a few things that have been successful with the feeding and care of the mealworms (all life stages)--particularly to have appropriate moisture:

  •  I am using food grade cornmeal (bought at restaurant supply store so it is very cheap for a 50lb bag).  My original bedding was wheat bran (livestock grade) and it despite microwaving, it was the source of my infestation.
    • Because it is so fine, I cannot sift frass from the cornmeal.  Okay for larvae as there are no eggs to worry about.  Less ideal for beetles.
  • Coffee filters:  These make a great floater for moist food.  The filter absorbs moisure and the larva can eat from below and above.
  • Cat food tins:  larvae enjoy the remnants of your canned catfood (to include the goo on the lid).
  • In looking for moisture, I found the following:
    • Leaves---I put some Japanese maple leaves in the larva bin to see what would happen.  The worms devoured them. 
    • Carrots:  I have found that taking a vegetable peeler and peeling long strips of carrot is the best way for larva to enjoy....they eat it quickly; get the moisture, and there is no waste. Putting chunks of carrot is a waste, in my view.  The worms cannot consume it before it goes past prime. 
    • Tortillas:   Larvae eat the tortillas, but not before they become very hard and dry.  In such a state they do not mold, and they provide a natural surface to add moist items (e.g. apple etc).  Same for bread.
    • Solid Pack Pumpkin (not pie filling):  I add this to my dog's diet and thought that the larva and beetles might enjoy.  I gave it a try.  It was a huge hit. I smeared some on tortilla and some stale bread.  
    • Vegetable trimmings: The larva enjoy vegetable scraps.  Brussel sprout trimmings, cabbage, green peppers etc.
    • Apples:  I slice thinly if I use.   I also offer the core, but find that it will often mold before being fully consumed.
    • Celery:  sliced thinly
    • Lettuce/spinach:  any that doesn't quite make it to your plate is appreciated by the larva.
Everything that I noted above works well because it is fully consumed, and there is no waste.  However, one of the most universally recommended items potatoes, is a no-go for me.  Even sliced thinly, they get hard, and the worms just do not seem to enjoy them. 

My mealworm project has been fascinating...in addition to seeing the remarkable life cycle of this beetle, the harvest of the larva keeps my bird friends happy. Nothing is as enjoyable as seeing my bluebirds (and other birds) enjoy their snack. And this time of year, I supplement with special suet enjoyed by all of the birds.


Mites in the Meal Worm Bin II

I wanted to provide an update on my mite infestation of my mealworms that I wrote about here.  This situation came about due to my increasing the humidity in my meal worm bin (as I had too dry of conditions prior and had die offs). Though the mealworms were happy, happy, happy it allowed for a mite population outbreak among all of my mealworm containers, despite my irradiating all of the bedding prior to putting it in. 

My strategy of divide an conquer combined with reducing humidity levels, seems to be working. I was reluctant to throw them all out and start over as I had come so far in my 1st generation cultivation and winter is coming.  I've abandoned temporarily my 3 drawer self sifting system for a setup to deal with my original occupants (beetles and worms) affected by this infestation.

I have four containers now since discovering the RAGING INFESTATION (mites covering everything to include outside the container like a large army) as follows:

  • Mite-infested beetle container 1:  this is my original beetle container.  They will be left to continue their life cycle. Mite infestation is greatly contained from original proportions, but still probematic.  Anything sifted from here goes to....
  • Mite-infested incubator container 2:  This contains (a) beetle siftings of eggs/frass (I no longer have my self sifting bin set up for this infestation) and (b) siftings from my worm bin (frass and tiny, tiny worms).  While tempting to just throw this out, there are so many worms/eggs in this mix, I just don't want to destroy them.  However, this container really has a mite problem. I wipe down the inside/outside of the container to remove the mites, and keep it away from my other two less infested bins.
  • Mite-infested worm container 3:  This contains worms of all sizes that don't fall through my fine mesh sifter in to #2.  I have a gold mine here, and I am keen on preserving them.  The mite infestation is mostly contained here largely because the sifting causes mites to fall out and stay in #2.
  • Clean container 4.  This container is in my office, away from the infested container.  I created this container from the occupants of #2 (worms and pupae).  I picked out the larger worms; washed them in a fine mesh strainer (dunked in water, rinsed off quickly with room temp water, and put on an absorbent towel).  There were NO ill effects to my worm friends.  Not one died, nor did they seem too disturbed by the process.
    • Worms will go to pupae stage and pupae from #2 are given same wash, rinse and dry and placed here.  Eventually, this bin will be all beetles, and will be placed in the self sifting bin.  
    • This bin will be the genesis of the 2nd generation, mite-free colony.


Mites in Mealworm Bin

In doing my research on starting a mealworm colony, I noted that grain mites can be a problem.  To avoid this catastrophe I dutifully microwaved the bedding substrate.  No problems.  When my last batch of mealworms ordered suffered an inordinately high rate of die off, to include the pupae which had about a 33% mortality rate, I increased the moisture.  My mealworms were fantastically happy.  However, this past weekend, seemingly overnight, I had a mite infestation.

In checking on my mealworms, I noted  webby stuff in a coffee filter basket (which I used for the water crystals.  When I looked closer, I realized that the bins were covered with fine white, moving mites.  Clearly, this was not a minor battle, but those little buggers (spiders actually) were in full siege mode.  They were crawling EVERWHERE.  And even though I had taken precautions and had separate bins, all of them were contaminated.  (Now I realized why I felt crawly things on my arms a few times last week after checking on mealworms.)  When I checked my wheat bran bag, (in the garage and far way from the colony, that was contaminated.  So clearly microwaving (or microwaving the way I did it) was not 100% effective.  However, I also introduced some brewer's yeast + I increased the humidity level quite a bit + I had some vegetable matter, so the source of the infestation could be manifold

I wasn't about to throw it all out.  Too much painstaking work went in to raising this first batch of worms which were now at feeding size for my bird customers.  Plus, I need to get pupae to replenish my 1st generation beetles who are running out of steam.  Here's how I'm choosing to handle--and I'll update on results.

  • took all bins outside.  I had a bin with incubating eggs worms and a large bin with more mature worms.  Beetles are still doing their thing.
  • sifted worms out but could not sift out all bedding.
  • Cleaned the containers with soap water and then a final rinse of bleach (and final rinse)
  • Put the worms (and their contaminated bedding into one of the bins).  
  • Began a process of  creating an isolated colony of mite-innoculated worms.  
    • I picked out individual worms in the contminated bin (but still less so) and gave them a wash off. That sounds crazy, but it worked. I simply put the worms in a fine sieve strainer, immersed it in water, and then rinsed under tap.  I then put them on a paper towel.  They did not appear uncomfortable, and they are thriving and happy.  None have died.  I was gentle, but they likely felt briefly water-boarded.

 I'm continuing to let the mite-infested colony exist with periodic harvesting for feeding the birds as well a a 'wash up' to increase the non-invested colony for development to pupae. For the mite-infested colony, I have deployed these strategies:
  • Put a band of vaseline around the top boarder of the bin to keep the mites from migrating out.(I found this helpful hint on the web)  (PS:  this does not work well)
  • Wiping down the sides of the bin with a vinegar soaked sponge to capture and destroy the hundreds and hundreds of little moving white dots. 
  • keeping the humidity level lower.
Though not an insignificant amount of works, my customers love it.  While waiting for my mealworms (1st generation) to mature to eating size, my customers went away.  That was fine as there were no nestlings/fledglings at the time.  Now that I'm back in the feeding business, the Carolina Wrens are feeding fledglings, and I have some Bluebird juveniles (3) that are coming to the feeder with a female.  I'm wondering if they are from the last fledge from the nest box.  And, my Summer Tanager girl has come back.  I have missed her.  Though, the bluebirds (even the juveniles) are very inhospitable.

Mealworms


There's alot of information on raising mealworms.  I've tried to adopt what appeared to my eye to be best practices (after going into an OCD research mode). My current production began with 5,000 mealworms.  Sounds like alot, but in reality, it is not once you consider harvesting for your customers (birds etc), allowing to pupate and die off (though that seems to be a very small percentage). I've since ordered 10,000 more.  I've reached the point where my pupa (from first batch) have become beetles.  I don't have a 2nd generation yet.  And even then, it will take weeks for them to reach the stage where I can feed them.  So consider your throughput for feeding and optimize your shipping costs by buying at least 5,000 to start. 

There was one blog in particular that was helpful, but I cannot locate it (it was many pages deep in the google search and my memory cannot recall it) to give attribution but will update this if I find it again (and I've tried!).  She kept meticulous records on what she ordered, harvested, pupated and beetles.  The next best source was Sialis.org   I'm not going that far, but I did want to provide some overview here from a novice point of view of what I consider best practices:

For the care and feeding of your larvae:
  1. First and foremost, mealworms (in all of their life cycle iterations) are living beings and should be handled with care and treated well. I've seen folks have all life stages tumbled together (and that works for them) or  stuffed in a container with a tight fitting top (that didn't work for them) and everything in between.  Follow basic common sense and know that all living things require air, moisture and food and protection from element/hazards.  These require less care than your kids.  But optimizing their care will optimize your results.
  2. Second:  If you have an aversion to wriggly things, this endeavor is not for you.  The larvae are noisy in their crawling in the substrate, and they wriggle with great gusto when you grab them.  The beetles makes crawling noises in their substrate.  If the feel sounds and sights of this make your hairs bristle, don't do this.
  3. Container:  Plastic, smooth sides, ventilated
    • Type of container (plastic, smooth sides) and floor space the most important.  (I had an old smoothish sided container.  But due to its age, it was rough enough for a few pioneers to escape.  I had to rehome the batch. Provide adequate room for your worms, with enough wall space that they cannot climb out.  Also, ensure that any that is in your substrate (paper etc) does not come in contact with your cover (ventilated!) because they will climb up and out.  These mealworms are VERY active.  So they are giving off moisture byproducts (just as we do) that also builds humidity in addition to what you are providing. 
  4. Mite infestation:  Whatever your substrate, microwave it before introducing to your "farm" to prevent any carryover mite infestation.My forgotten blogsource had this problem, and it was a source of much work to abate. An ounce of prevention as they say. (I've since read that microwaving does not provide a great eradication, and my experience proved me right).
  5. Substrates:  Many substrates can be used to provide food and 'cover' for your mealworms.  I buy cornmeal in 50lb bags for my suet production.  I can buy a 50lb bag for less than $20.  I also have wheat bran from the feed store.  Again, 50lbs is about $16.  Whether food grade or feed grade...microwave (or freeze) to prevent mite infestations.  I also put in some finely milled whole wheat flour, ground up cat dry food.  See the Sialis link for excellent nutrition info. (Update:  I've since moved to layer (non-medicated) feed which is cheap and works great.  The wheat bran had a mite infestation that caused me great problems even though I microwaved).
  6. Moisture.  The larvae and the beetles require moisture. There must be a balance between too much moisture (causing mold/fungal growth n substrate) v. not enough. The amount of moisture sources you need is commensurate with the amount of mealworms that you have. I have found that my mealworms do much better with providing greater moisture than what I saw recommended. An apple or two or potato or two as week is not cutting it.  So ensure that you are optimizing available moisture.. I found the following to be worthwhile:
    1. Potatoes and Apples--If these are sliced very thinly (use your food processor slicing blades, or simply a sharp knife) these can be managed well and provide moisture without any mold detected.Many folks noted that potatoes got moldy.  Mine have not. But they do turn color form oxidation.  If there is enough surface area (e.g. THIN), then the mealworms/beetles can avail themselves to the moisture.
    2. Carrots:  Chunkier slices allow the worms to bore through.  I've not notice any mold. (Update:  I find that taking a vegetable peeler and peeling long slices optimizes their enjoyment).
    3.  Coffee filters, Handiwipes, unbleached coffee filters dampened with a spray bottle of water are welcomed. They also eat through this.
    4. Burlap: This addition seems to be the home run. I have some rough burlap coffee sacks.  I cut pieces of it to use in my mealworm containers.   I use a spray bottle to mist them and fold them in half.  The larvae LOVE to be in between these layers. I HIGHLY recommend.
    5. Fresh bread slices.  If it dries out, I mist them. Have not had any mold.
    6. Water crystals (for beetles): Personally, I would nix all the other stuff and simply use water crystals. I believe this to be a HUGE best practice. I'm using the water crystals for the beetles, and that is working well.  Soak crystals according to directions. Put them in the fine mesh shipping clothe, and soak in water (like a tea bag).  (I had to cut it and sew a bag with the top open.  Pour crystals in, soak in water and tie off top).  Place on a a protective plastic lid to keep bedding dry.  The beetles can climb on it.  They love it.
      • I'm experimenting with these for the larva as well.  I put it in the burlap, and I can already tell that the mealworms are loving it. 
      • (Update 07/14/2018)--I had a large amount of my 3rd purchase worms and subsequently pupae die off.  After research, I believe that the humidity level was subpar.)
  7. Hiding Places:  These worms like to burrow.  Crumpled up newspaper, brown packaging paper are welcome places for them to hide, and these places make it easier for you to harvest them.  (Pick up paper and shake it out--though be warmed they can flick up and out of your container very easily!).
  8. Styrofoam:  The beetles and the worms like styrofoam.  Packing peanuts also loosen up the substrate.
  9. Tools.  These are delicate beings.  I recommend the following:
    1. Plastic artist canvas (Darice) screen works as a great sifter or to put overtop smaller plastic containers to ventilate (the are rigid enough to make a great top) and can also be used to provide bottoms for self sifting (see below) .  You can fashion a rectangular sifter by cutting the corners diagonally and folding them in (inside one corner, outside the other corner).  You can staple and hot glue.  I found this sifting basket easier to use than a sieve.
      • This canvas can also be used as the base in the a self system cannister.
      • Worms can still get through this if given enough time!
    2. Tweezers.  I have some long tweezers from a medical kit.  These work great for removing dead worms.  You probably don't have to remove them, but I prefer to if I see them.  I would not use these on live pupa--but for dead pupa (which turn greyish black), they are a necessity.
    3. Plastic spoon. A plastic spoon allows for gentle removal of pupa (next life stage).  I noted from the blog (that I cannot remember) that too much sifting resulted in damaged pupae causing wing/leg deformities in the beetles.  I've been mindful of that, and keep sifting to a minium. (Update:  I don't sift, yet I still notice some deformities.  So I think that it is simply a matter of genetics).
    4. Litter scoop:  I outfitted a litter scoop by lining with the plastic artist canvas and hot gluing.  Very easy to scoop and sift.   
    5. Dust mask:  I think that wearing a dust mask is a good precaution.  I can already sense some respiratory irritation.
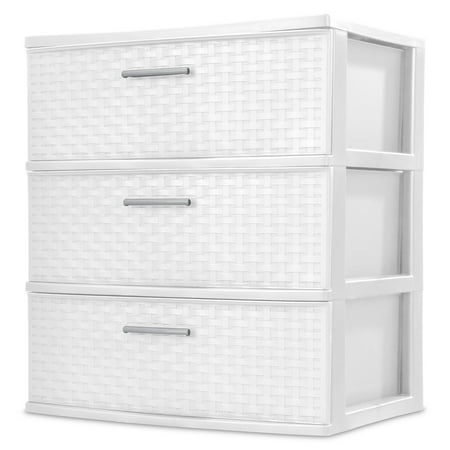
  10. Meal worm hotel.  I am using a 3 drawer Sterilite ($20 from Walmart delivered!) for part of my colony.  I have not added any addition ventilation as there appears to be ample ventilation just in the spaces around the drawers (to include my opening them often etc.).  I will revise if necessary.(Update 07/18, no additional ventilation needed).
    • Sterilite 3 Drawer Wide Weave Tower, White Top Drawer is a self sorting beetle and pupa incubation drawer.  I have a black cryovac container that I cut one end out of.  I placed it upside down so that the beetles can hide under it.  On top, I have pupa in a shallow cardboard stationary box top.  I cut the corners out of one in and pressed flat so there is an escape hatch.
    • I cut the bottom out of the top drawer and installed the Darice 12x18" plastic canvas. This method allows self sorting of the eggs, though you have to remember to open both drawers if you are opening the top drawer.
    • The second drawer has substrate and is awaiting eggs to drop down and become small larva. I'm not far enough into the process for this.
    • I also have other containers with larvae. I think that it is a best practice to to have some separate conatainers for your investment in case there is some sort of infestation.
  11. Separating life stages: the mealworm motel is a self contained hotel that keeps life stages separate.  Different folks do different things (like glom them all together.  I don't think that optimizes results, but it might be just fine). Update (I noted pupae in the beetle bin were being cannabilized (with rigor) by beetles). 
    • Where I have the larvae substrate, I note that the pupa seem to rise to the top of the substrate. Accordingly, one doesn't need to do alot of sifting to find them.  I also noted in a blog (that I cannot attribute because I cannot find it) that she noticed much deformity in beetles due to sifting for the pupa. I'v heeded her advice and use a plastic spoon   to gently scoop them up and placed in a safe incubation container. I do not recommend tweezers or your hand as either seems to exert too much pressure and causes the to wriggle with discomfort. 
      • Once you notice pupa, you essentially have a graduating class.  You will notice more pupa everyday (and throughout the day).
    •  Pupa are mummies so they only need ventilation and to stay at proper temp.  I put them in a shallow stationary cardboard box lid mentioned in 10 above.  This way, they are raised up from the beetle fray, safe and comfortable.  When they become a beetles, (and you will be surprised how quickly they begin to turn en masse) they can escape the box lid opening into the beetle substrate. 
      • For those needing a little shepherding, I found that cutting a piece of styrofoam egg carton provides a gentle way to maneuver them without harming them. 
      • Like the pupa forming from the larvae, once you notice the final metamorphis to beetle, you will notice LOTS of this happening every hour.
  12. Other notes/learnings/observations
    • Wash hands before and after for your health and theirs.
    • You must monitor for escapes.  It happens.  I find beetles out and about (HOW?).  And with any of the paper etc, those worms can easily get flicked off.  There is no harm done, but...
    • I noted in a research paper that adding some Brewer's yeast and dried milk powder can boost nutitive value of substrate and provides needed B vitamins.
    • They don't smell, but you will be able to smell your substrate.
    • This is a fascinating project for kids (though I have adult children and no grandchildren).  And I have to say that I was mesmerized by the pupa turning into beetles.  I'm now waiting on the final stage of the beetles to lay eggs.
    • Purchasing mealworms online (I got mine from Rainbow) are 1/2 the cost (even including shipping) of price in store.
      • if even you are at home, my worms were in the unairconditioned truck and were quite warm when I got them.  I cooled them down quickly, and there were no ill effects, but I don't think an hour or two more in the mail truck would have done them any good.
    • I was surprised how quickly I used up my first 5,000 larva.  My second order was 10,000, and even then I'm wondering "How did I use them so fast!?"
      • If you are actively feeding birds or reptiles, realize that you may need much more than you initially think.
    • It's not much time.  I'm spending more time just do to my fascination with it, and getting things set up.
    • I don't do anything to make things darker in the room. I keep the light off.  There are two windows, and it is pretty dark up there.
    • Mealworms are calcium depleting so ensure that you put some calcium (I use pulverized, sterilized egg shells) to coat mine to maintain bone/eggshell producing strength of your customers.
    • Besides being an interesting thing to observe, your bird friends (or other grateful cold-blooded recipients which I don't own) will enjoy them.