Mealworms


There's alot of information on raising mealworms.  I've tried to adopt what appeared to my eye to be best practices (after going into an OCD research mode). My current production began with 5,000 mealworms.  Sounds like alot, but in reality, it is not once you consider harvesting for your customers (birds etc), allowing to pupate and die off (though that seems to be a very small percentage). I've since ordered 10,000 more.  I've reached the point where my pupa (from first batch) have become beetles.  I don't have a 2nd generation yet.  And even then, it will take weeks for them to reach the stage where I can feed them.  So consider your throughput for feeding and optimize your shipping costs by buying at least 5,000 to start. 

There was one blog in particular that was helpful, but I cannot locate it (it was many pages deep in the google search and my memory cannot recall it) to give attribution but will update this if I find it again (and I've tried!).  She kept meticulous records on what she ordered, harvested, pupated and beetles.  The next best source was Sialis.org   I'm not going that far, but I did want to provide some overview here from a novice point of view of what I consider best practices:

For the care and feeding of your larvae:
  1. First and foremost, mealworms (in all of their life cycle iterations) are living beings and should be handled with care and treated well. I've seen folks have all life stages tumbled together (and that works for them) or  stuffed in a container with a tight fitting top (that didn't work for them) and everything in between.  Follow basic common sense and know that all living things require air, moisture and food and protection from element/hazards.  These require less care than your kids.  But optimizing their care will optimize your results.
  2. Second:  If you have an aversion to wriggly things, this endeavor is not for you.  The larvae are noisy in their crawling in the substrate, and they wriggle with great gusto when you grab them.  The beetles makes crawling noises in their substrate.  If the feel sounds and sights of this make your hairs bristle, don't do this.
  3. Container:  Plastic, smooth sides, ventilated
    • Type of container (plastic, smooth sides) and floor space the most important.  (I had an old smoothish sided container.  But due to its age, it was rough enough for a few pioneers to escape.  I had to rehome the batch. Provide adequate room for your worms, with enough wall space that they cannot climb out.  Also, ensure that any that is in your substrate (paper etc) does not come in contact with your cover (ventilated!) because they will climb up and out.  These mealworms are VERY active.  So they are giving off moisture byproducts (just as we do) that also builds humidity in addition to what you are providing. 
  4. Mite infestation:  Whatever your substrate, microwave it before introducing to your "farm" to prevent any carryover mite infestation.My forgotten blogsource had this problem, and it was a source of much work to abate. An ounce of prevention as they say. (I've since read that microwaving does not provide a great eradication, and my experience proved me right).
  5. Substrates:  Many substrates can be used to provide food and 'cover' for your mealworms.  I buy cornmeal in 50lb bags for my suet production.  I can buy a 50lb bag for less than $20.  I also have wheat bran from the feed store.  Again, 50lbs is about $16.  Whether food grade or feed grade...microwave (or freeze) to prevent mite infestations.  I also put in some finely milled whole wheat flour, ground up cat dry food.  See the Sialis link for excellent nutrition info. (Update:  I've since moved to layer (non-medicated) feed which is cheap and works great.  The wheat bran had a mite infestation that caused me great problems even though I microwaved).
  6. Moisture.  The larvae and the beetles require moisture. There must be a balance between too much moisture (causing mold/fungal growth n substrate) v. not enough. The amount of moisture sources you need is commensurate with the amount of mealworms that you have. I have found that my mealworms do much better with providing greater moisture than what I saw recommended. An apple or two or potato or two as week is not cutting it.  So ensure that you are optimizing available moisture.. I found the following to be worthwhile:
    1. Potatoes and Apples--If these are sliced very thinly (use your food processor slicing blades, or simply a sharp knife) these can be managed well and provide moisture without any mold detected.Many folks noted that potatoes got moldy.  Mine have not. But they do turn color form oxidation.  If there is enough surface area (e.g. THIN), then the mealworms/beetles can avail themselves to the moisture.
    2. Carrots:  Chunkier slices allow the worms to bore through.  I've not notice any mold. (Update:  I find that taking a vegetable peeler and peeling long slices optimizes their enjoyment).
    3.  Coffee filters, Handiwipes, unbleached coffee filters dampened with a spray bottle of water are welcomed. They also eat through this.
    4. Burlap: This addition seems to be the home run. I have some rough burlap coffee sacks.  I cut pieces of it to use in my mealworm containers.   I use a spray bottle to mist them and fold them in half.  The larvae LOVE to be in between these layers. I HIGHLY recommend.
    5. Fresh bread slices.  If it dries out, I mist them. Have not had any mold.
    6. Water crystals (for beetles): Personally, I would nix all the other stuff and simply use water crystals. I believe this to be a HUGE best practice. I'm using the water crystals for the beetles, and that is working well.  Soak crystals according to directions. Put them in the fine mesh shipping clothe, and soak in water (like a tea bag).  (I had to cut it and sew a bag with the top open.  Pour crystals in, soak in water and tie off top).  Place on a a protective plastic lid to keep bedding dry.  The beetles can climb on it.  They love it.
      • I'm experimenting with these for the larva as well.  I put it in the burlap, and I can already tell that the mealworms are loving it. 
      • (Update 07/14/2018)--I had a large amount of my 3rd purchase worms and subsequently pupae die off.  After research, I believe that the humidity level was subpar.)
  7. Hiding Places:  These worms like to burrow.  Crumpled up newspaper, brown packaging paper are welcome places for them to hide, and these places make it easier for you to harvest them.  (Pick up paper and shake it out--though be warmed they can flick up and out of your container very easily!).
  8. Styrofoam:  The beetles and the worms like styrofoam.  Packing peanuts also loosen up the substrate.
  9. Tools.  These are delicate beings.  I recommend the following:
    1. Plastic artist canvas (Darice) screen works as a great sifter or to put overtop smaller plastic containers to ventilate (the are rigid enough to make a great top) and can also be used to provide bottoms for self sifting (see below) .  You can fashion a rectangular sifter by cutting the corners diagonally and folding them in (inside one corner, outside the other corner).  You can staple and hot glue.  I found this sifting basket easier to use than a sieve.
      • This canvas can also be used as the base in the a self system cannister.
      • Worms can still get through this if given enough time!
    2. Tweezers.  I have some long tweezers from a medical kit.  These work great for removing dead worms.  You probably don't have to remove them, but I prefer to if I see them.  I would not use these on live pupa--but for dead pupa (which turn greyish black), they are a necessity.
    3. Plastic spoon. A plastic spoon allows for gentle removal of pupa (next life stage).  I noted from the blog (that I cannot remember) that too much sifting resulted in damaged pupae causing wing/leg deformities in the beetles.  I've been mindful of that, and keep sifting to a minium. (Update:  I don't sift, yet I still notice some deformities.  So I think that it is simply a matter of genetics).
    4. Litter scoop:  I outfitted a litter scoop by lining with the plastic artist canvas and hot gluing.  Very easy to scoop and sift.   
    5. Dust mask:  I think that wearing a dust mask is a good precaution.  I can already sense some respiratory irritation.
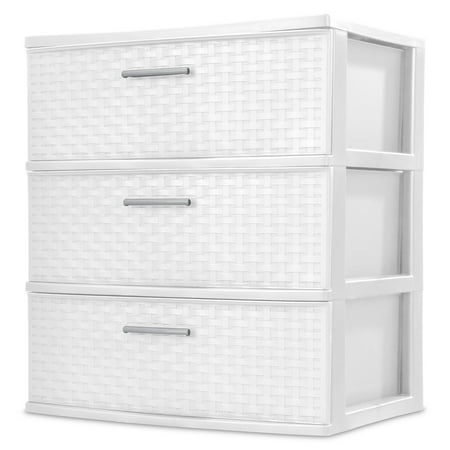
  10. Meal worm hotel.  I am using a 3 drawer Sterilite ($20 from Walmart delivered!) for part of my colony.  I have not added any addition ventilation as there appears to be ample ventilation just in the spaces around the drawers (to include my opening them often etc.).  I will revise if necessary.(Update 07/18, no additional ventilation needed).
    • Sterilite 3 Drawer Wide Weave Tower, White Top Drawer is a self sorting beetle and pupa incubation drawer.  I have a black cryovac container that I cut one end out of.  I placed it upside down so that the beetles can hide under it.  On top, I have pupa in a shallow cardboard stationary box top.  I cut the corners out of one in and pressed flat so there is an escape hatch.
    • I cut the bottom out of the top drawer and installed the Darice 12x18" plastic canvas. This method allows self sorting of the eggs, though you have to remember to open both drawers if you are opening the top drawer.
    • The second drawer has substrate and is awaiting eggs to drop down and become small larva. I'm not far enough into the process for this.
    • I also have other containers with larvae. I think that it is a best practice to to have some separate conatainers for your investment in case there is some sort of infestation.
  11. Separating life stages: the mealworm motel is a self contained hotel that keeps life stages separate.  Different folks do different things (like glom them all together.  I don't think that optimizes results, but it might be just fine). Update (I noted pupae in the beetle bin were being cannabilized (with rigor) by beetles). 
    • Where I have the larvae substrate, I note that the pupa seem to rise to the top of the substrate. Accordingly, one doesn't need to do alot of sifting to find them.  I also noted in a blog (that I cannot attribute because I cannot find it) that she noticed much deformity in beetles due to sifting for the pupa. I'v heeded her advice and use a plastic spoon   to gently scoop them up and placed in a safe incubation container. I do not recommend tweezers or your hand as either seems to exert too much pressure and causes the to wriggle with discomfort. 
      • Once you notice pupa, you essentially have a graduating class.  You will notice more pupa everyday (and throughout the day).
    •  Pupa are mummies so they only need ventilation and to stay at proper temp.  I put them in a shallow stationary cardboard box lid mentioned in 10 above.  This way, they are raised up from the beetle fray, safe and comfortable.  When they become a beetles, (and you will be surprised how quickly they begin to turn en masse) they can escape the box lid opening into the beetle substrate. 
      • For those needing a little shepherding, I found that cutting a piece of styrofoam egg carton provides a gentle way to maneuver them without harming them. 
      • Like the pupa forming from the larvae, once you notice the final metamorphis to beetle, you will notice LOTS of this happening every hour.
  12. Other notes/learnings/observations
    • Wash hands before and after for your health and theirs.
    • You must monitor for escapes.  It happens.  I find beetles out and about (HOW?).  And with any of the paper etc, those worms can easily get flicked off.  There is no harm done, but...
    • I noted in a research paper that adding some Brewer's yeast and dried milk powder can boost nutitive value of substrate and provides needed B vitamins.
    • They don't smell, but you will be able to smell your substrate.
    • This is a fascinating project for kids (though I have adult children and no grandchildren).  And I have to say that I was mesmerized by the pupa turning into beetles.  I'm now waiting on the final stage of the beetles to lay eggs.
    • Purchasing mealworms online (I got mine from Rainbow) are 1/2 the cost (even including shipping) of price in store.
      • if even you are at home, my worms were in the unairconditioned truck and were quite warm when I got them.  I cooled them down quickly, and there were no ill effects, but I don't think an hour or two more in the mail truck would have done them any good.
    • I was surprised how quickly I used up my first 5,000 larva.  My second order was 10,000, and even then I'm wondering "How did I use them so fast!?"
      • If you are actively feeding birds or reptiles, realize that you may need much more than you initially think.
    • It's not much time.  I'm spending more time just do to my fascination with it, and getting things set up.
    • I don't do anything to make things darker in the room. I keep the light off.  There are two windows, and it is pretty dark up there.
    • Mealworms are calcium depleting so ensure that you put some calcium (I use pulverized, sterilized egg shells) to coat mine to maintain bone/eggshell producing strength of your customers.
    • Besides being an interesting thing to observe, your bird friends (or other grateful cold-blooded recipients which I don't own) will enjoy them.

Bluebirds--Falling in Love and Dealing with Trauma of Premature Fledging due to Snake Predation.

I provide this narrative to (1) introduce how we became interested in bluebird nest and more importantly (2) relay our stragegies in a premature fledging situation.

We had a tough winter in Virginia.  We have always fed the birds during all year long.  I've never gotten fancy, just black oil sunflower, millet for the smaller birds and suet (which I make)**.We had a couple of days cobbled together of -5F nights, which has been unusual in recent winters.  Also, we had a few freakish snow storms.  Those two things presented a perfect storm for bird's needing supplemental feeding.

When it is so cold, to give the birds a caloric boost, I make suet.  I typically melt lard and peanut butter together and add various flours.  The recipe that I am using consistently is 1 part fat (combo of mostly lard and some peanut butter; 2 parts corn meal; 1 part flour.  I work in pounds, so I'm using 1lb for each "part" (1 lbs fat; 2lbs cornmeal; 1 lb flour).  You can other ingredients such as raisins (ensure that your dogs cannot ingest).  I've had good results using Masa flour in place of the cornmeal. I also add some mixed seed--scattering, not densely. I place my suet in tradition green suet baskets (which last for years and years unless crushed by a possum's grip), as well as put "suet muffins" on the platform feeders.  Hardware cloth  (e.g. rat wire) also makes it easy to put suet just about any place.

Once the mixture is cooled in fridge (or freezer) it cuts easily. I use loaf pans, muffin pans, square silicone baking pans to serve as mold.  If you use a metal pan, particularly a muffin pan, you can put it it on your stove top and heat the bottom.  It releases beautifully.

This year, I noted several anomalies.  First, the juncos were eating at the suet and seed (platform) feeders.  I've never seen these delightful birds at a feeder bur rather hopping about on the ground in their cheerful way.  However, this year, I used my McGyver skills, and I fashioned some platform type feeders.  Placing both suet and seeds in these feeders, I ended up with lots of eager eaters to include the juncos.  Second, I had bluebirds at my suet feeders.  I had 3 pairs of bluebirds, and I don't recall ever seeing them in the winter at my yard (though they overwinter in VA). 

Seeing them sparked an interest in bluebird houses.There's lots of information on the internet, none more comprehensive than you will find at Sialis.org.  I also find Cornell Lab of Ornithology a great place for bird identification, feed suggestions, and bird house building.

We built 3 bluebird houses along with the predator guards to thwart snakes, raccoons and other bird seeking varmints. (Though I should note that our 'territory of open yard' will only support 1 house.  Was hoping another species would take residence.) Some of the web information said to not be disheartened if you had no bluebirds.  We were thrilled to get a nesting pair (and they chased another pair from one of the other houses.)The other houses, which could have housed chickadees, were not used by any species.

My one attempt at 'monitoring' the blue bird box caught the hen on her eggs (though I had announced myself).  I did not attempt further monitoring, and I'm sorry for that now. Over the last couple of weeks, we have enjoyed watching these industrious parents feed and remove fecal sacs from the nest. However, because I did not monitor, I do not know how many eggs were laid nor how many hatched which did cause a problem. Let me explain.

On Saturday, mid-day, there was a raucous noise of birds. Both Mark and I went outside and inspected near the box.  We were looking for a snake as that was the type of alarm that we heard.  Not only were the parents furiously flying about--agitated in a way we've not seen, there were several other birds (warblers and chipping sparrows) that had joined in.

We didn't see anything, and we went inside.  Mark went on a motorcycle ride.  Oddly, the male blue bird kept approaching the window (which was odd behavior).  Plus there was still alot of  noise continuing outside.  I pulled out the binoculars (not a very good pair I should add), and I notice in a little sapling near the house a very shiny black color. SNAKE!

I'm terrified of snakes, but I armed myself with a broom and went out.  The snake, a slender but long rat snake, was about 10 feet up and stretched out on a horizontal limb, and the broom was not up to the task. (Meaning that I had to be underneath him enough to reach with the broom, and he could simply fall on top of me).  I threw everything handy-brick, old wood pieces-- but he wouldn't budge (and my goal was not to maul him).  Searching about the outside of the house for a suitable tool for this job,  I found a very long, metal scaffolding brace. Not only did it have heft (and I could heave it), but it had length to get me a safe distance for his dismount!

 I proceeded to bang the sapling as hard as I could and I broke all of the horizontal branches, getting closer and closer to him.  I was not going to kill him, just disabuse him of the notion that this was a friendly place.  It did not take long (metal on a sapling yields a very strong noise and vibration) for him to relocate.

The parents would not go back into the box.  I decided to look in the box.  I removed the top and found nary a chick.  Had they fledged prior? (Had I monitored, I would have known if they were old enough to fledge on their own and how many).  I had seen the parents caring for chicks (occulted from my view) in the box, so I know they were chicks there earlier.  Further,   I was confident that the snake had not eaten the chicks because there were no bulges in him.  Where were they?

The chitting and flitting of the bluebird parents continued.  I thought I had seen something hopping in the yard, but then did not see anything when I got closer.  All dogs were rounded up.  (The bluebird house was outside of our fenced area to protect against the dogs).  Noise!  Noise!  Noise! There, I spotted a baby bird.  I scooped him up.  There's no way this chick had fledged normally.  There was still some down flecking on its head.  Tail feathers were but stubs and behind shoulder blades was naked as a baby's bottom skin. I placed him in the nest box.

Thirty minutes later I found chick #2.   I placed the chick back in the nesting box.  They were there for more than 4 hours.  I was watching vigilantly, and I could tell that the parents were NOT going to go into the nest box. They were still squawking about the box hole but were not oging in. Well, there were two chicks in there that would die a slow death.  What to do?

I searched for, found and  called a wildlife rehabilator.  She said to bring the chicks in and warm them (it was cool outside).  She said that if a box is predated, then it is unlikely that the parents would return to it.  (Though there was no snake incursion, the proximity was enough).  Further, she said that the snake would be back. [Note: I later read from online resources that when the nest is under attack, that the baby birds will spontaneously fledge (whether ready or not) in response to the the alarm call of the parents.]  In that caucophony of bluebird and other bird alarms calls, they all bailed presumably.  I should also note that the snake has not been back. Metal scaffolding brace on wood sapling provides a powerful THWAMPING that no animal would want to come back to.  Good vibrations for me to get him away.

I nabbed the pair of chicks and brought them inside.  Mark and I warmed them in our cupped hands and they became more active.  I in an ornamental birdcage that I had (who knew it would have a use?) and put their nest in there as well. I placed a microfleece towel in there so the could stay warm. Given that they had not eaten for so long,  I tried to feed them mealworms and softened cat food (as instructed by the wildlife rehabber), but they would have none of it.  It was clear that this strategy would not work.

I elected to take the bird cage (which had a removable top) outside and place it on top of my mealworm feeder which my bluebirds were very keen on.  I whistled (as I had been doing each time I put out mealworms for the last 3 weeks), and placed the bird cage with the door open and the top off.  It hangs from a large oak tree branch (with about a 15 foot wire cable) and NO predator can get to it.

To my great relief, both the male and female came and immediately began ministrations of their two chicks.  Later that evening, I found chick #3 and took him to the bird cage. It nestled in with its mates.  I was putting meal worms out of the momma bluebird to ease her burden--as it appeared that the male, previously so diligent--to include when I first put the cage out--had abandoned helping her care for this brood.  However, I observed him taking mealworms and offering them to her on a tree branch.  I'm not sure that was even the original father.  Who's to know?  Plus, my neighbor has bluebirds, and he has noticed them coming back with mealworms. Is this a male looking for a mate?

Nevertheless, the female and (who has been guarding the nest and dive bombing the Carolina Wrens who were getting mealworms nearby) was still getting the mealworms and taking them around back.  She had also been "chitting" without stop around the southside of the house (the 'nest' is now on the west side where I found chick #3.  But I didn't see anything.

As it was going to be cool over night and the bird cage is just that a cage, I was concerned for inclement weather.  I slipped the cage into an insulated plastic shopping bag and left the front open  for the momma bird (who was using this entrance in addition to the top).  She chitted and chitted at us as we protected the 'nest'.  I fretted all of Saturday night over the babies.

Sunday--woke with trepidation wondering if the chicks who had been in the box were weakened beyond repair from not having been fed.  I stuck my hand in the cage, and everyone was nestled in tight.  Everyone was warm.

Female is still taking food to the south side.  She's chit, chit chitting in the dogwood (and she never has been in that tree).  There!  Chick #4 had been hanging out by a brush pile that we kept out there for the birds.  (Basically a pile of tree branches from a palanomia that we cut down.  The birds love to be in it).   Fortunately, he had survived a very cool night.  He was fussing and waddling to get away from me once he could tell that I was in nabbing mode.  Surprising, the female did not dive bomb me, but I could tell it crossed her mind.   I nabbed him but not without having to throw a shirt over him (I didn't wan't to injure him) and the female bird raising a stink via chitting (though not as loudly as if I had been a snake predator).  I placed him in the 'nest'.  Now everyone is together and the female can ministrate to a single nest.  Though all in one place, the female continued to chit and fly to the dogwodd for a few hours. Finally, her initial distress dissipated, and she focused on these chicks.

Now...the importance of monitoring.  I still don't know if there is a missing chick.  It is entirely possible that the 'absent' father is helping that chick.  Despite my best efforts, that remains an unknown.  However, if I had counted, I would know.

Nevertheless, I'm on day 3 today.  I believe that my nestlings are about 12-13 days old when they prematurely fledged (site notes 17-18 days as the norm) based on the great photos on Sialis.  The nestlings are safe and cozy.  Their momma is taking care of them in the makeshift nest, and they can complete their development safely  and fledge normally.

Conclusion:  I was not prepared for the notion of a premature fledging due to predation. However, our strategies were successful (so far, fingers are still crossed--see P. S. for the happy ending.) due to the help of a wildlife rehabber who generously took my call on a weekend and warned that the nest was likely abandoned (even though I had put the then two neslting back in it and the great and extensive information available online.  But mostly due to the dedication of the parents and their trust in us.  I know this sounds far fetched but the male bluebird  coming to the window seemed as if it was beckoning me to come back outside was very cool and allowed me to successfully intervene.  Also, that I had "trained" the bluebirds (and nuthatches and Carolina wrens) to know that when I whistled, fresh meal worms would be available at a known location helped me beckon the parents for the makeshift nest.

My neighbor, Tim, who has had bluebirds for years helped give me moral support and confirm that these birds were not ready to fledge--meaning that I was not intervening inappropriately and that my interventions would help them develop further.  He also noted the irony that as a 'first timer' compared to his many years without incident, that such a thing would happen to me.


P. S.  I am happy to report that all 4 pre-fledglings were cared for by their mother in the makeshift nest.  On  Tuesday afternoon, I had one fledge.  On Wednesday, I had one fledge in the a.m. and the other two fledged in the afternoon.  I am thrilled.  This is the best Mother's Day lead up ever.  As much as I watched that nest, I cannot believe that I did not see anyone fly out!


**I belong to Restaurant Depot so I can buy in bulk and make suet much cheaper than I can buy the cakes for.  And it is easy to do and doesn't take much time.  Plus I know what is in it.