Flutterby Progress

With my continued need for my secret decoder ring for left/right mirrored triangles and their place, and where the nexus block spins next, I'm putting pieces up on the wall. I cannot imagine undertaking this project without a design wall. I would have resigned from the project long ago.


 I now have Jen's Quilt Lovely book, and for this quilt, I'm not learning anything different about the pattern that I didn't deduce using Block Detective skills in looking at the 2-3 pictures I found on line--and of course the actual size of the elements.  She uses a template to cut the split rectangles, and she interestingly cuts rectangles first....my fashioning as well from my Peaky/Spike days. Great minds!  But I would never use a template for all of the split rects required here.  A perfect example of getting a ruler that you can use across many quilts with different size options.


I would also note that her block finishes at an odd size (not providing info here given that it is a pay for book).  I choose to make my split rectangles from a ruler, and I had sized out my block long before I had her book in hand.  I choose to make 9" blocks (full quads measuring at 18" finished).  However, making this again, I would size my split rectangles smaller--probably 2 x 6, and then key the remaining blocks from that resizing to have a quad measure 6 x 6 finished.

I'm not disappointed in my choice, but a think that a smaller block would have more charm.

 Where I called a nexus block of the same fabric to join two split rectangles, she anchors the outside block on the 4 patch with such a block (static color). No difference to my eye.

I find myself imagining what the split rectangles would look like using string pieces....

The book is a nice inspiration--particularly for any who gravitate toward scrappy quilts.  I'm not a scrappy quilter...but as part of my Swedish Death Quilting mantra...I need to be. This Flutterby is the perfect scrappy quilt as are MANY of Jen's other designs.  So her use of scraps....eclectically and in beautiful settings. . .  was the real payload.

Her quilt "Glitter" is also one that I may attempt, but the odd shapes in that will require one to want to have a project that they are totally in love with.

Now that I have built solid skills, I feel like I can tackle a project such as Glitter.  I also wish to do a Kaleidoscope Quilt (not one block wonder, but using the ruler).


!$%#$^#$%^ Flutterby Directional Dyslexia


 I'm working on my Flutterby quilt featured in Jen Kingwell's Quilt Lovely.  I found the block on line, and I then studied it and fashioned it into a quilt using EQ8.  I was captivated by the block, became more familiar with Jen's work, and I bought the book.  

If you suffer from spatial dyslexia as I do: Time OUT

Honestly, I simply put those two words together because it described my issues--as it turns out there is such a thing--though it is called directional dyslexia! To wit....

Quick facts about directional dyslexia:

  • Not an actual kind of dyslexia, more of a symptom of other types of dyslexia or a different kind of disability all together
  • Sometimes called spatial or geographic dyslexia
  • Distinguished by left-right confusion and a tendency to become disoriented or lost
  • May be related to difficulty remembering sequences and short term memory deficits

Source:   https://www.dyslexia-reading-well.com/directional-dyslexia.html

Remember the "I could have had a V8" commercial--with the giant smack to the forehead?  Did you hear me smacking mine?  Well, that sure explains a lot--and it explains EXACTLY so many issues I have with typical navigation (left, right, Huh?) and this quilt block.  (Flashback 30 years ago...to being lost in DC (after getting off the wrong exit on my way home)  because streets were redirected for traffic from two way to one way and "Where the hell am I" panic set in.

With this block, I've had a few of those "Where the hell am I?" moments.  At least I'm still in the safety of my sewing room!  Spatial dyslexia explains why I have such a large number of seams  ripped out because when I sewed a split rect to the nexus block, it looked so very right but was so very wrong--I put the wrong mirrored split rectangle. (I rarely have to rip out seams).  It also explains why I love my EQ8 program so much...because I cannot do these things in my head...I need visual cues.

Yes, I made a test block.  Yes, I "followed" it.  Yes, I still screwed up.  I had to resort to taking my test block (which is one of 4 to get the full effect), in manually rotating.  I then put my split rects on my design wall, and then built the block on the wall.


For those of you with excellent spatial faculties (and are never met with "No, your other left" from others), you may laugh at the thought of this painful dissection of the "obvious".  It seems obvious to me too!  Except in practice, from my brain to my hand, it does not work.  Accordingly, I have to teach my brain to learn the cues--build endemic understanding of the block...so I'll know when I'm wrong before I sew the $#!%^$^%& seam.

Each block is the same.  It is just turned one rotation clockwise or counterclockwise depending on where you wish to start.  I started in the bottom right quadrant.  A gang of four displays a complete rotation of one of the quadrants of this block. The nexus square on the split rectangles (or alterntatively the outside colored square on the four patch) travels one complete rotation around the block. On the perpendicular, each quadrant is a mirror of the other.

And although I have never researched spatial dyslexia before, all of the above describes the strategy that I had to deploy to understand this simple block--and what I discovered on the way to making this post.

per the website

2) For poor sense of direction

  • Write down the steps to your destination and try to memorize them


Cooking Learnings

 I used to do quite a bit of cooking, and I don't mind saying that I probably cook better than I can do most other things.  I'm a classically trained accountant. . . not a classically trained chef.  Having small dinner parties and feeding people was something that I enjoyed.  My goal was simple:  I wanted to create a meal that would rival those great restaurants near where I live. My goal was to surprise and delight my guests.  I think that most times I succeeded.  But it has been a long while since I've entertained that way.   It was a lot of work and expense and no longer became joyful. 

Thanksgiving meal domain still remains mine.  And I do enjoy that meal...but fewer around the table with parents gone.  No little ones have been spawned between my two kids...and likely that will not happen for various reasons.  Nonetheless, the joy of learning new things, or kitchen experimentation was certainly sparked.

I have OCD proclivities towards most things that I tackle:  what is the optimum process/technique to get the best outcomes.  In my quilting adventures, this proclivity is alive and well.  It's not a bad habit to have, but there is such a thing as the aphorism

Perfection is the enemy of the good.

One New Year's Eve dinner, I was to have a standing rib roast.  I searched high and low to find the perfect way to fix it.  I found the answer in a surprising place.  I had a vintage (1957 ish) House and Garden cook book (James Beard was the food editor), and there I found the perfect technique.

Why the fuss?  An $80  roast demands it.  I settled on the high heat to sear and dialing back as called for in the cook book.  It was magnificent.

My girlfriend invited us to her home for a pork roast dinner.  I packed my Chef's Alarm.  I apologized for being so OCD, but I knew that she would want her roast to be at the perfect temp:  145.  She had not seen the lovely, snakey probe that allowed the door to stay open but the temp probe to be snugly nestled in the meat while the digital read out was easy to see.  I indulged in some cooking education.  The perfectly cooked roast was proof enough of the efficacy of such a device.  She bought one for herself and her daughter.  My work was done.

I do have a kitchen gadget fetish.

Chef Jean Pierre taught me how to make sumptuous gravy using the simplest technique of whisking flour in a fine mesh strainer lightly submerged in the liquid you are trying to thicken.  My only gripe is that in the last 37 years, I had not thought of that myself.  Gravy was so poorly executed by me, I made it just a handful of times. 

I employed the tangzhong method for my cinnamon rolls.  They were wonderful. Though the method is supposed to increase the shelf life of baked goods, cinnamon rolls by rights have a short shelf life--both in their texture profile (always best from the oven) and in the fact that they are so good, they don't last long.  The tangzhong made for a finer tasting roll the next day over not using it.  But, same day is the best day to consume cinnamon rolls.

Other fun (and effective) culinary adventures:

  • modified a recipe for whiskey balls.  These will be my go-to.  I hope that  you'll give them a try.
  • made potato gnocchi from scratch.  Surpisingly easy and good.
  • made mascarpone cream cheese from scratch.  Surpisingly easy and good.
  • made "pumpkin" pie from butternut squash and carrots...which may be my go to fall pie at Thanksgiving (the carrots courtesy of falling short on the squash product volume). My Chocolate Maple Pecan tart will always get star billing.  It is my signature dessert.

Though none of the above may seem like much, it represents my doing more in the kitchen (outside of the normal ordinary course of business) than I have done in a while.


. . . and it felt good.


Split rectangles


In executing on my Flutterby Quilt Block, Jen Kingwell.  I'm so taken by the block that I ordered her book "Quilt Lovely".  Her blocks are made from templates.  Too fussy for me...and they are a weird size that are not on rulers...not convenient enough for me.  But as the block is a modified nine patch, you can pretty much size it how you will. So I have no problems executing.  Her book has several lovely quilts, and I am happy to support her work and was inspired by her use of color.

I confess...I'm making a 9" Finished block quadrant (4 = 18" square).  I think future renditions will be at a 6" block.  But I'm soldiering on, and I'm not feeling regretful.

In the "you have to kiss a lot of frogs" vein of my personal odyssey to find the optimum way to make this block (when you have 144 to make,  you want to optimize at every step), I created this video. I tried using the rulers that I had; I made templates to paper piece.  I said f-💣 it...I'm getting Deb's Ruler. 

Aside.  I have Deb's VBlock ruler.  Though not advertised to do so, you can absolutely use this ruler to make this block AND to trim it down.  The only difference is the seam line for the trim does not go from corner to corner.  However, there is enough of a line there that so long as you sew you seam correctly, you can be assured that you darn close.  The benefits of the Split Rects is that you can make larger blocks, it has an option line for some fancier cuts, and it has the seam line that follows the block from corner to corner.  For ~$21 on Amazon...it is worth getting.

My verdict.  If you are going to make this block

  • Get Deb Tucker's Diamond Rects Ruler.  Slightly oversize; expertly trim down; and have blocks that will finish perfectly to the size that  you need.
  • Consider using my demonstrated method of cutting the pieces from a rectangle. You can save much time by power cutting your rectangles v. futzing about with realigning your ruler on strips.
    • You can stack and whack your fabrics and make many pairs effortlessly with NO sacrifice in accuracy.
  • Consider using my demonstrated method for trimming
    • Trim all of your blocks using the first trim down pass (if you are right handed, right side, top), then stack them with the same orientation in a pile for the second pass.
    • Rotate the entire stack, then make your second cut.  This time, you are merely lining with the finished guides.
  • Consider glue basting  your seams (so long as you don't plan to press open)
    • You can process many pieces and set them down for some rapid-fire chain piecing.
      • no worries for any shifting
      • glue basting stabilizes the bias.
  • Consider using reversible batiks to make it more foolproof as you train your eyes and brain to work with this block.

Gingebread Rum Balls | NYT

 We all agreed that the final result was much improved--for our tastes. It is was I settled on and made a double batch to put in tins for folks.  Because it has nuts and alcohol, I noted same on the tag.

Add to Plan to Eat

Gingerbread Rum Balls

This is the perfect recipe to make if you’ve got crumbs leftover after building a gingerbread house. Or you can use a package of gingersnaps ground up in the food processor or blender. The flavor of rum balls improves after they sit for a couple of days, so plan ahead if you’re considering these for a holiday bash. They will last for two weeks or even longer if you store them airtight at room temperature. Rolling rum balls in confectioners’ sugar gives you a soft, moist confection while using granulated sugar results in a crunchier texture. And if you’d rather skip the alcohol, you can substitute orange or apple juice for the rum. Just reduce the confectioners’ sugar by a tablespoon or two, to taste.

Source: cooking.nytimes.com

Course: Desserts

Yield: About 2 1/2 dozen balls

Serves:

Ingredients

  • 2 12 cups/ 360 grams cookie crumbs Stauffers Ginger Snaps
  • 1 14 cups/ 125 grams pecans
  • 34 cup/ 85 grams confectioners’ sugar plus more for rolling if you like
  • 13 cup/ amber rum or 80 milliliters dark, brandy or bourbon, more as needed
  • 2 12 tablespoons maple syrup
  • 2 tablespoons unsweetened cocoa powder
  • zest from one orange
  • 12 teaspoon ground cardamom
  • 12 teaspoon ground cinnamon
  • 12 teaspoon ground ginger
  • Pinch fine sea salt
  • 14 cup whipping cream change from original to add moisture
  • 14 cup semi sweet morsels change from original to add moisture and sweetness

Directions

  1. In the bowl of a food processor, pulse together cookie crumbs and pecans until nuts are coarsely ground. Do not overprocess — you want the nuts to have some texture. Alternatively, finely chop the pecans and toss them in a bowl with the crumbs.
  2. Edit: In a separate bowl create a slurry of whipping cream and semi sweet morsels. Microwave on lowest setting to melt. This modification was to improve both flavor and consistency.
  3. In a separate large bowl, stir together (new)-orange zest, whipping cream/chocolate slurry- confectioners’ sugar, rum, maple syrup, cocoa powder, fresh ginger, cardamom, cinnamon, ground ginger and salt. Add to food processor and pulse until just combined, or stir into bowl with the crumb mixture, squeezing everything together into a mass. Taste and add more fresh ginger if you like.
  4. Roll dough into 1-inch balls, then roll in confectioners’ sugar or granulated sugar. If the dough starts to dry out as you roll the balls, drizzle in a little more rum. Store in an airtight container at room temperature (they will keep for at least 2 weeks); roll balls in additional sugar just before serving.

Amount Per Serving (1)

  • Calories: 108
  • Protein: 1 gram
  • Sugar: 8 grams
  • Carbohydrate: 13 grams
  • Fat: 6 grams
  • Sodium: 64 milligr
  • Fiber: 1 gram

Powered by
Plan To Eat

Flutterby Block Quilt Block | Jen Kingwell or Serendipity Happens

 I ran across this lovely "Flutterby" quilt block in searching for quilt blocks with split rectangles. I learned that Jen Kingwell created a pattern using this block configuration, and it was featured in Quilt Lovely (her book).  I am a new quilter, so I do not have Jen's patterns nor her book (nor had I heard of her).  

Below are 4 blocks crafted and put together.  Such dynamic color play and movement. (EQ8!!!)

This block is an uneven 9 patch.  So multiples of 3 work well with this as you consider sizing your blocks.


Flutterby Quilt Block Jen Kingwell
Flutterby Quilt Block | Gang of 4

I was writing about my Economy Blocks which I paired with Triangle in Square Blocks (Peaky + Spike/Vblock), and I thought I would make some Split Rectangles.  My  Tri-Recs  tool is a 2 part tool.The "Tri" tool makes the center triangle in a Triangle in Square/Peaky+Spike/VBlock.

The "Recs" portion, which creates the flanking triangles, when paired together, when paired to its mirror creates a rectangle--a split rectangle or half rectangle.  I will settle on "Split Rectangle" or Split Rec for my preferred block name.

I wanted to make a quilt with Split Recs, as I think that it is an interesting block.  It is a deceptive block in that is is simple, but if you get your angles wrong or sizing wrong, it will not look so good when put together.  And that wide crotch seam where the two rectangles come together really will showcase imperfections in your technique.

While I have good tools for making the Triangle in Square Blocks (Peaky + Spike/Vblock), not so much for the split rectangle. UPDATE:  While writing this post, I went to my Deb Tucker "VBLOCK Ruler", and I found that using my rectangle method of cutting blocks for sub-cutting into angles, her tool works wonderfully, AND I can use it for trimming these blocks down to the perfect size.  Now, Deb has Split Recs tool (which I ordered before I had this "Ah Hah!" moment).  I see now that I don't need it, but I don't mind supporting her by having an extra ruler. I will do a comparison, but I already know that having dissected the $#%!$%#^ block (to include the mirroring and mirroring of mirroring on foundation paper piecing), that it will work.  And I have the headache to prove it, and the tears from wrong way blocks. (I should add that I have a Tri-Recs tool that does the VBlock, but it does not offer the trim down opportunities that the VBlock does.  Another duplication of tools, but having done so solidifies the learning/construction for me--and allows me to share the differences with others.

The block below was crafted for a 9" finished block.  4 of these blocks creates the Flutterby effect in the opening picture.  Below is 1/4 of that "Gang of 4".

  •  
  • A 4 patch block that takes of 2/3 of the block's finished size (6" F)
    • It has 3 muted color blocks and 1 colorful block as noted.
      • The 3 muted blocks provide a place for the eye to rest and provide a calm middle for the vibrancy of the movement caused by color changes and shapes of the split rect.
    • You can change up the colorful outside block for delightful colorplay (and use up some colorful squares.
  • A 1 patch of "Nexus" block that is 1/3 the size of the total finished block.  (3" F).
    • The Nexus block remains static throughout and provides color harmony.  (I have a couple of blocks in my opening picture that show different colors than the dark gray.).  
      • This block provides unity to the rectangles, and provides, along with the background colors in the 4 patch a place for the dynamism of the block to unfold without making you go all googly-eyes.
  • Two mirrored Split Rectangles (One Top Left to Bottom Right (TLBR)) and the other Bottom Left to Top Right (BLTR) that are 1/3 in width and 2/3 in height of your finished block.(3" x 6" F)
    • If you are working with these, coming up with a code for identifying the rectangle's properties is helpful. If you are spatially challenged as I am, such a simple block can pose all manner of knitted brows!  Accordingly, I use TLBR and BLTR..using the left as my anchor for reference to help me visualize.
    • Here you can come up with a beautiful melange of colors.  
    • Notice that they create a windmill blades in the intersection of 4 blocks.

The Scissortail Quilting Company has a wonderful post and download on this charming block.  I found it after I had done my own block detective work.  There are not too many references on the internet to this block, and if you visit the links mentioned above, you will see a lovely rendition. No need to duplicate excellent work done by others.  I hope that you'll pay a visit to her excellent post, and beautiful website.

I'll write more as my project/learnings unfold.


Using This for That


I created a brief video that shows how to repurpose ordinary but useful things in your home to extraordinarily useful things in your sewing area.

I will likely create a series of this as I have lots of stuff that I've repurposed!


Pet Peeves | "The Best ______"

 While there are many things one could carp about, I dedicate my energy this a.m. to one:  The nonsensical advertisement of any recipe as being "the best".  In this current "high baking" season where we lavish sweets to our friends and neighbors, there are so many "best" cookie recipes. 

A search of "Best Chocolate Chip Cookies" yielded 1.56 million hits.   And there are 12 thumbnails.

 
The ratings on just these 12 range from 4 to 5.  If the were the best they should all be rated 5.  
 
The point is the "best" to one taste preference is not the best to another.  A simple changing of "Favorite" for "Best" would eliminate my peeve and provide the more impressive conclusion that because there are 1.546 million favorite Chocolate Chip Cookie recipes, means that they are quite the favorite of many.

If you are new to cooking/baking, you will find that you will have some recipes that you prefer over others--even if they are touted "best", and you will learn to make adjustments to find your preferences. There are so many great websites now with tested recipes (and family recipes that might be less exact in descriptions).  And if you review comments you will see that many have different outcomes than the recipe.  It's great inspiration and education. 


Sharpening a Rotary Blade

 Rotary blades are consumables in the quilting workspace.  A sharp blade 

  • promotes accuracy:  A dull blade pulls and stretches fabric when you press down on it if it is unable to cut.  You will see this most notably on bias cuts...pay attention to how the fabric is behaving under the ruler--and you can see this unwanted movement.
  • increases production:  If  you cut through many layers, you produce more product per cut. Nothing is more aggravating than trying to cut through layers and then cutting the endless threads or section that were not cleaved through on the first pass.
  • reduces fatigue: if you can increase your production, reduce re-cutting, you are physically doing less. 

 I became acutely aware of the importance of reducing fatigue when I was making so many HST and QST units for my Modified Betwixt.  Making 240 units of one unit and 180 blocks of another really brought home how optimizing one's cutting strategy could reduce unnecessary steps.  Unnecessary steps mean more time and more wear and tear on your hand/shoulder unit.

I've considered getting a rotary blade sharpener.  However, I've seen mixed results.  Karen Brown  (Just Get it Done Quilts) has good things to say about her purchase.

As I have a knife fetish, I have many useful sharpening tools in the kitchen.  Because I have a Diamond DMT sharpening set

I conscripted the extra fine stone into service.  I have stones, but because I wanted to sharpen my rotary blade in its holder, the low profile of this stone was perfect.  I didn't feel like I needed to go through any stages.  Further, to be clear, one could just as easily mess up a blade.  So my maiden voyage was on a blade that I would have replaced.

 My initial approach was awkward.  Because the blade was still in the holder, I could only make very short movements of the blade on the stone.  I ensured that my angle was not too acute as to dull the blade or worse, misshapen it.

To my surprise and delight, it worked very well.  The small spot that was skipping now cut straight through.  Therefore, with little time and effort, I was able to improve my results.

Nevertheless, I realize these are consumables, and I always keep plenty on hand for all of the aforementioned reasons why keeping a sharp blade is preferred.

If you have some knife sharpening skills and the equipment, it might be worth a try.  I would not undertake this method otherwise.


John Lennon's Death: 41 Years Later

 Forty-one years ago I was a college student when John Lennon was killed.    I remember that day well, not so much because I was a Beatles fan but, because of the reaction of a couple of my classmates.

The class/course was 18th Century Art, Music and Literature.  It was taught at Virginia Commonwealth University by Dr. Lyles, Chair of the English Department and Dr. Hester, Chair of the Art Department.  The class was a Sr/Gradual level class.  I was a Jr.  It was one of the most interesting classes I had ever taken (I was an Accounting Major and took all of my electives in the English Department).  Not only was it taught by two luminaries, but my classmates were very interesting.

When I walked into the room the morning after John Lennon had passed (a fact that I didn't even know) a couple of the older classmates were visibly shaken. One,BP, had sunglasses on.  Inside.  In the a.m.

It was clear that something deeply moving/disturbing had happened

"Why the sunglasses?" I asked.  He replied somberly, "I was up all night crying."  I asked if someone had died in his family.    "John Lennon died."  BP was also a musician.

That was a long time ago, and I was but a wee lass.  I remember it so well as if it were yesterday.  Not because of John Lennon, but because of the love that many had for him.

YouTube

 YouTube is my go to for so many things.  It is an index of knowledge of stuff that I don't keep in my head...much like my blog.  

I elected to experiment with the video on my OnePlus 8 phone, and I found that it takes pretty good video.  There are so many times where watching something v. reading about something allows a quicker click in the brain of the watcher.

So I elected to take a leap and experiment with video.  My first efforts are just that...first efforts.  My goal is simply to be able to demonstrate some of my quilting hacks, and perhaps show some other content.

I will generally do a post on anything that I do a video on and include that video within the post.


Quilt Suspension System

 Today my husband installed the quilt suspension system that I designed (by shamelessly coopting other ideas).  I looked at all of the internet "stuff" that I could find, and I concluded that I would not buy any system sold as they were essentially DIY stuff that any could make or procure.

The three key components of your suspension system are 

  • Type of system 
    • Pet Grooming Arm Clamp on table
    • Suspension from Overhead
      • Rail system using an L-shaped design from left making a 90 degree turn right (or two perpendicular pieces)
        • Get rings to fit on your rail so that they can easily move (like your shower curtain).  I used 1" macrame rings on my 1/2" pipe.
      • Single eyebolts or similar hardware for secure holding
  •  Suspension modality
    • bungee cords
    • Adjustable straps
      • these are inexpensive on Amazon.
      •  Use a ring on the end to attach the carbiner, and run the
  • Clamping Modality
    •   Pony 2-in 3200 SERIES (ratchet) Spring Clamp is perfect.  These clamps are light weight, inexpensive, have a ratcheting clamp that quickly releases.  DO NOT get a regular spring clamp.  It will be too difficult to open and close.  
    • Run some paracord or other small cording through the whole in the handle and attach to a small carbiner.


You sew/quilt in a common area.  I believe that dog grooming clamps are an excellent choice for a support arm for your quilt. They run under $40 each.  You would need at least two (one on the side and one on the block) plus the clamps and a way to affix the clamps.  I recommend adjustable strapping which you can easily get on Amazon.  So the costs on this could be under $100.  Considerably cheaper than retail alternatives. 


 You have a dedicated space and room overhead.

I created a video (my first;and not great, but illustrative of what I'm "splaining"~!)


 An overhead system is perfect. Below is a diagram of my system.

The rod is 1/2" aluminum thick walled conduit pipe that is suspended from ceiling by about 1". Free to me as it was discard.  A threaded rod is in the stud in three palaces to support the conduit with pipe clamps. I could hang off of this if I wanted to.

I put 3 2" macrame rings on the left hand side and the back. 

As I have webbing and hardware, I made an adjustable strap.  Because my strap is adjustable, but not quick release, I used a swivel hook through my webbing to attach to the top ring.  That way, I can take it down whenever I like.  I also put a macrame loop on the strap (hangs freely).  I attach the carbiner to this macrame loop--and the carbiner is attached to the paracord on the Pony Clamp.

I did a test drive of my system, and it is perfect for my needs. I emphasize the following design components:

  • Pony Ratchet clamp  2".  Do not get smaller.  You don't need larger. 2" is the Goldilocks size.  I started out with a qty of 4, and I don't think that I need more.  Total cost $20--they are less than $5 each.   There is a small hole on the handle that is perfect for slipping a piece of 1/4" paracord or other sturdy cording.  If you are using paracord, cut it and burn the end of it to seal it.   Paracord is a useful thing to have around.  I think I have a lifetime supply.  The metal "trigger" that you see releases the clamp.
    • Adjustable straps.  Here's a link to an Amazon Product (not an affiliate link) to give you an idea.  I already had strapping.  The link that I gave you has 4 of these for less than $9
    • Carabiner:  Here are the carabiners that I purchased from Amazon.  They work perfectly with paracord.  Remember, you using this as a bridge between the paracord which is looped on your clamp to your webbing/belting.  Total cost $8.99, but I only used 4 and I have 6 to use for other things.  You can see that little keyhole shape at the bottom.  The paracord nestles into that nicely.
       
      • 2" Macrame Rings   These worked really well. you could also use shower curtain rings, but I recommend something that will move freely and will not flick off as you work with your straps. These rings were inexpensive, high quality and move freely on the rod.  MOVING FREELY is the key word.  When I needed my strap to move, I didn't have to get up at all.  I did have to get up to rearrange my clamp on the quilt or to get more/less slack.  Hence the importance of ADJUSTABLE feature.  $8.69
        • Bungees might be a good alternative, but I purposely did not use them. 


  • Lobster Clasp 1":  Because my webbing was 1", I used this clasp.  It clips to the macrame hook and my adjustable strap goes through the base.  Amazon's price for this was crazy ($10 EACH). NOPE!!!!  I have many of these because I used them on my dog leads.  You may consider an alternative.   I would suggest using another carabiner and a macrame ring INSTEAD of this clamp.  It would be much cheaper (pennies).  Put the macrame ring on your webbing (you will have two, one for the top and one for the bottom) and you will clip the carabiner though the top macrame ring on you strap and clip to the pole. 


I don't know how much the  1/2" aluminum conduit pipe is.  My length was 10 ft, and I would recommend that.  It will likely cost under $50 to include the hardware to hang it.

Overall, my suspension system cost less than $100 if you were to duplicate it, and if you provided the labor yourself.  All you need are some basic tools, know how to find a stud insert drywall anchors, and have a drill.

I cannot begin to tell you what a game changer my setup is.  My test drive made me realize how much easier my quilting life is going to be with a small investment of time and money.


3" Economy Block Redux | Peaky and Spike, V Block


Economy Block + Triangle in Square
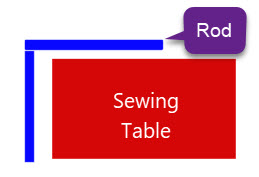
Here's my wall of 3" Economy Blocks.  I have been making them using foundation paper piecing.  I was evaluating my color values, so this is a desaturated picture.

My goal in piecing this block was to systematically use up some fabric in a colorway leftover from another quilt.  I don't care for the colorway, though it made a lovely quilt.  Moreover, it made lovely economy blocks. A  3" economy block makes a perfect center for a 9" finished 9 patch.  For example, you can make a 6" finished Sawtooth Star, which sports a 3" finished center.  I love the Sawtooth star, but I decided that I was ready to use my Tri-Tool ruler, and I was going to make V Blocks (Deb Tucker's name for it), Tri-Rec (name of the tool to make, it is a square block), or the older name Peaky and Spike.

Here's my test block (unsewn).

Economy Block + Triangle in Square


You can see that I have MANY economy blocks on the wall (59) and many more to finish. Let's round to 60 for discussion.  I have 240 (60 x 4) blocks to make to make the 9 patch above. Though I have not settled on other renditions, this is just a first pass.  Nevertheless, I have several maker's notes to consider if you are faced with a daunting amount of blocks to make.  (And how cute are these blocks for mug rugs or hot pads?).  These notes will get you in Henry Ford production mode if you are tackling a large project.

First:  Get a ruler dedicated for this.  For less than $15 you can get a high quality ruler that will help you to make this block.  This ruler will allow you to make the triangle in square as well as split rectangle block by joining two mirrored pieces of the side triangle.

💣💣  Don't be tempted to use your 60 degree ruler here.  The angle is 53.5 degrees--a difference worth noting. 


Tri-Recs Tool Zimmerman


There are many ways to skin the quilt cat. As I have to make so many of 3" finished blocks, I was figuring out my production method to put these in a 9 patch with an economy block at the center. As always, making a test block is important advice.  I had to use a scant 1/4" to get my block to measure 3.5" across.  Using a perfect 1/4" put me a wee bit short.  Different fabrics and thread will dictate your small adjustments needed.

  • I actually have two rulers--Deb Tucker's V Block and Darlene Zimmerman's Tri-Tool ruler.  Either ruler works, and my duplication of the tool was by accident.  Having a ruler to do this is almost an imperative. I will note that Deb Tucker's ruler makes the perfect trim down ruler, although once you get your seam width correct, there are only dog ears to nip off.  As it is a common block, why not make an investment in accuracy and ease?
    • Tri-Tool or Tri-Recs ruler not only makes the square blocks as demonstrated here, but also the  proportional rectangle blocks (2 x tall as wide)--simply by using the side ruler and creating mirrored blocks.
  • Use a helper ruler for awkward left sided cuts:  Using a helper ruler butted on the left hand side allows for an easy cut on that end without reaching around.  This ruler comes with its own helper...the center  triangle is the helper for the side triangle and the side triangle is the helper for the center triangle.  Using a helper ruler works so much easier than turning the fabric about--I don't know why it is not demonstrated more.
  • (Here's the money shot!). The side triangles can be cut from a rectangular piece of fabric:  Okay, you know what that means.  If you cut a proper sized rectangle, you make one ruler alignment, one cut, and if you have stacked your fabric (right/wrong sides together), you will have 2 mirrored units (mirror from the top and bottom fabric.  If you cut one layer, you will get the same "side". So if you cut one layer, you will have to flip your ruler on its backside on each alternate cut.  That is a waste of time in my view.
    • How to figure a proper sized rectangle?  Easy.  Simply make 2 cuts to get two pieces.  Align the first cut with straight line on the left.  Second cut, rotate your ruler.  Now butt these together and measure (see bottom of this post for better visual).  That is the width of your rectangle.  The height is dictated by the called for strip size for the unit that you are making.(You could trace on paper and measure that way too).
    • I have 3" finished blocks (trim size 3.5").  I have LOTS of these to do. The proper sized rectangle for me is 2 5/8ths.  The strip width needed is 3.5".  
      • I reverse engineered my cuts. (See below). I cut my strip at 2 5/8 wide (awkward size cut once), put wrong sides together for mirror and used my Stripology ruler to make the 3.5" subcuts. 
        • Itty Bitty Eighths ruler works well when dealing with eighths has it has a line to easily follow.
      • With my rectangles perfectly sized, I made ONE alignment with my side rectangle, and with one cut, I had 2 pairs of perfectly mirrored side triangles.  You can see what a time saver this is! 
        • The side nick on the tool is easily accomplished by just nicking the corner (sans the tool) with your rotary cutter and avoids the awkward nick using the tools.  Once you've used the tool, you will be comfortable doing this.
        • Marti Michell's Deluxe Corner Trimmer has an angle for the Peaky and Spike.  If you use that to cut the top of your side triangle, (v knicking the bottom), it will line up perfectly with the top of the center triangle.  This method would work well if you had a different tool.
      • There is NO wasted fabric using this method. For just a few sides, simply cut a smaller piece of fabric; you don't have to work with a full strip.  This cutting coupled with glue basting (note 4) would make Henry Ford envious of your production rates.Note 3: I have a corner cutting tool (Marti Michell's Deluxe Corner Trimmer) that has a corner for the peaky/spike block--which is what this block is also known as. It cuts the top tip so that it aligns perfectly across the top (v. the bottom). (It's a fab tool that has many uses! It's an observation and a work preference. The little nick on this tool allows perfect alignment. 
      • Glue basting is a great way to produce a lot of blocks, in addition to the cutting methods noted above. Glue baste one side to the triangle (run a bead of glue, place the side to the triangle, and quickly heat set. You can stack up a number of these, and then chain piece. Press open, and then rinse and repeat on the other side. This method also has the advantage of stabilizing the bias on both pieces. (I use the method for Diamond Rectangles as well)
      •  When working with triangles (regardless of the tool), some tools have a flat tip, some have a pointy tip. Accordingly, block construction/strip widths WILL (not may) vary if you use a pointy v. a blunt tip without modifying your strip width. Marcie Baker has a great video on this. As a newer quilter a couple of years ago, I did not understand how rulers differed in this regard.

 How to cut your side pieces en masse using a triangle:

 Here is a segmented piece for a 3" block.  I cut it from a 2 5/8" WOF cut using my Itty Bitty Eighths Ruler which has the 1/8th marks with continuous dashes (easy to line up). I subcut the strip using my GE Designs Striplogy ruler.  Quick.  Accurate.


 Now let's align our side triangle.


Now let's make the cut


 You can see the little nick in the tool on the upper left.  I choose to freehand nick.   One alignment; one cut; 2 freehand nicks.
 
💡 The above image give you a visual for figuring out the initial size.  For my TEST, I cut a 3.5 piece of fabric, made my first cut, and then rotated the ruler clockwise one rotation to make the second cut on the right hand side.  Mushing the two together and measuring the width, tells you the width that you need for your rectangle.  In my case, it is 2 5/8ths. I cut my strip using this odd measure, and then subcut with Stripology ruler to make the on the 1/2" cuts (3.5 in my case).  It is a real time saver.
 
Pretty nifty, don't you think? 
 
Wait, wait, there is more.  (This is updated, my first table had errors that I did not catch).
 
Here are my measures for the rectangles.  As you can see for every 1" increment in the strip size, the width increases 1/2".  The reason...there is a 2:1 ratio of  height to width.  Note, too, that the point measures 1/2 inch.
 
I should note that the real math is this:  strip width/2 + .75".  But for the Tri Recs tool, I found that the extra 1/8" allowed for better service due to alignment of ruler, paralax and all that stuff.
 
Align once; cut once; nick twice. 


 In the end, though, I would recommend Deb Tucker's V Block over this tool. This is a precision block with precision points and there is bias...accordingly, my adopted best practice is to slightly oversize and trim down.  That way, I have 100% success rate (unless I fall asleep at trimming) on making a perfectly balanced (across bias lines) and perfectly sized block.