Showing posts with label FD Project. Show all posts

Paint

Our heat wave in the East continues.  At least the three successive nights of violent storms have abated.  With power restored, at least we can keep cool. However I'm aware that in these economic times, there are many who cannot keep cool.

I wanted to do a post about the paint colors that I used on the FD Project.

BM Urban Legend on the door
and Oak Ridge Trim


BM Oak Ridge on Porch and
Urban Legend on the front door
 The exterior of this home is belies its 2552 interior space.  This home has 25 windows, a full walk out basement.  This will be a spacious, comfortable and beautiful home for the new owners.   
I stayed mostly within one card on the Benjamin Moore color chart (from the Classic Deck), beginning with Winter Wheat (232).

For the exterior of the house, I wanted to find a color that would harmonize (rather than provide too striking a contrast) with the existing siding.  My designer and I chose Benjamin Moore Oak Ridge for the porch and for the window trim.  I used a DTM product for the metal trim on the windows and the door.  It covered the previously brown trim beautifully.

The front door also had storm door (that had to be removed due to style and condition).  It had been screwed into the metal wrap,  leaving holes.  Further, the metal wrap was separating from the wood.  I puttied and caulked all of the issues away, leaving an intact substrate. 
BM Cream Fleece (233) in Aura matte on the walls
 and Linen White Trim


The home looked overwhelmingly beige.  I went further down on the color card and painted the front door Urban Legend.
For the bathrooms, which exceeded my expectations, I used Creme Fleece on the walls with Linen White Trim.  It is a soothing and beautiful combination, and it looked terrific with the tile choices.  I chose the Aura Kitchen and Bath paint for the walls.  It is a product that is expensive, but it has many attributes that make it a great choice for bathrooms.   I also chose this for the master bedroom. 

For the upstairs bedrooms, I chose Linen White on Linen White to create a soft white that would blend well with many decors without being 'blinding white'.


Pergo Elegant Expressions Buchanon Maple
BM Winter Wheat (232) walls/trim
Pergo Buchanon Maple Elegant Expressions Laminate
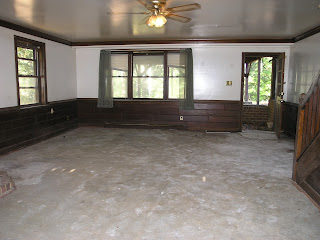
 The downstairs (it doesn't feel like a basement) and the great room upstairs were painted in BM Winter Wheat--another great neutral that is soft, harmonizes well with most colors.  The Pergo Elegant Expressions Laminate in Buchanon Maple was a great choise for the downstairs which has 3 more bedrooms. The bow front window in this walk out basement gives this a downstairs v. basement feel.  This is truly a spacious and comfortable room.  The wainscoting and trim in this house was previously stained dark wood.


New flooring, recessed lighting and paint transformed this room to this. 


The Finish Line....

While I've not crossed it yet, I'm darn close!  I have this mop that I took with me to clean up all of the dust off of the hardwood and laminate floors at my FD project.  It is surely nice to have progressed from shovel and scraper, to push broom to dust mop.

One problem with this 'all over' renovation, is that anything that you choose NOT to renovate will stand out like a sore thumb.  At FD project, the sore thumbs are the exterior paint on the back doors (up/down) and the interior door hardware (hinges/knobs).  With my daughter's house, the switching out of the hinges and knobs made ALL the difference in the world. 

Yesterday, I schlepped over to Lowe's and purchased knobs and hinges.  Their Gatehouse brand is inexpensive and looks good. 

Today, I continue to work toward the finish line.   Already it feels good to have entire rooms "cleared" of all punch list items.  Hanging the mirrors in the bathrooms was an accomplishment.  The first mirror was a smaller mirror that I could handle myself.  What I couldn't handle is the measuring tape!  I had figured the place to hang it fine and how to center it fine. It was even level as I had the 4 foot level with me.

Unfortunately, I had difficulty in measuring the distance between the hardware to hang.  (The mirror hangs hard on the head of the screws in the drywall anchor.)  Eighths?  Sixteenths? They do matter.  I was off a smidge...and a smidge was too much.  I managed to fix it.

I do have a tip for hanging 'stuff' when you cannot see the back of the item you are hanging or what you are hanging it to.  On the surface that you are hanging something on, take painter's tape and mark the wall where the top of the hanger is located so that it can be seen on either side of your object that you are hanging.  On your object, take painter's tape and mark on either side of the object where the hardware is to hang. 

For example on the the mirror, I put painter's tape on the sides of the mirror exactly where the hardware was that sat on the screw heads.  ON the wall, I extended the tape from the center of the screws.  Matching up the tapes on the wall and the mirror had me securing the mirror in no time.  Failed attempts mean scratched walls.

I'm off to work now.  Have a productive and safe day.


Tons of Work

The FD project is in its final throes of completion.  The random width pine floors have been refinished, and they look great.  My countertop project still languishes, but it will be conquered before week's end.  I still have to put a final coat on all of the base trim; get a couple of new doors installed and painted, hang a few light fixtures...and finish the landscaping.

On the latter, we bit off, chewed and swallowed (with a large lump in our throats). The current landscaping consisted of pea gravel over barren dirt.  Many of the azaleas and box woods had died or were in the grip of death--though a few were giving a valiant fight!  Sunday was  one of the hottest days of the year so far, with a high of 93,  and we tackled the 14 tons of topsoil that sat impressively under the shade of the large beech tree in front of the house.

So with the help of a skillfully operated Ford tractor and the strong backs of my husband and son (in addition to Charlie who operated the tractor--an amazing 60-something year old man who can outwork men much younger than he), and a few minor contributions from my own back before I retired inside to paint base trim, . . . .

  • the existing dreck of pea gravel was scraped up
  • the large ruts from the 30 yard container and the dump truck (which got stuck) were smoothed
  • other lawn carnage was swept away (dead bushes, limbs etc)
 . . . . and all 14 tons of top soil was spread and the conclusion reached that 14 more tons of top soil was needed in addition to 5 yards of mulch.

The additional product was delivered yesterday; so we can have "at it" again--hopefully under more temperate condtions than blistering 90's. The curb appeal was measurable improved--but more needs to be done. Removing the ratty mail box post did quite a bit to upgrade the view.  It surprising how the 'little things' that you do add up to really big improvements.

 Before and after pictures will be coming soon.


Floor: Done and Done!

At the FD project, the basement floor is installed....and every fiber of my body feels the 1200 sqf of flooring that was put down.  The Pergo Elegant Expression (in Buchanon Maple) was the perfect choice.  The floor certainly lives up to its name.  Unlike many laminate floors that I see, this one does not have the obvious 'pattern' that your eye picks up.  Perhaps it will in the photos, or when I get everything off of it!

Unlike many basements, this basement consists of a great room, a bathroom, and three other separate rooms.  It really feels integral to the house, particularly given that the stairway downstairs is visible and very open.So there were many jambs to cut.  We used the Porter Cable multi-tool which we bought for just that reason.  It has many other uses, to be sure.  However, THIS USE, cutting jambs, is not the best use (in my non-professional view).  For my next project, I'm just going to get a true jamb saw.  It will be more adequately powered and likely will smoke less blades.

The transformation of the basement space is almost complete.  I still need to get Cover Stain on the basement hallway and the remainder rooms and bathrooms, and then final painting.  The house is going to be completely brand new inside.

I learned a trick from a painter of 30 years, and I will be sure to remember it--and wanted to share it.  He counseled

When you run into walls and ceilings that are painted in a semi-gloss (as many older homes are), consider putting a primer (flat) over the walls first.  A primer will
  • hide many of the imperfections (thereby reducing work)
  • give traction to repairs if still needed (provide a surface for spackling, drywall tape etc to adhere to).

Now if you ask any dentist, doctor, attorney, tradesperson, about any 'particular' thing, you'll get more than one answer.  There's a reason for the aphorism, "there is more than one way to skin a cat".  The 'right' way is often that individual's (no matter what his/her experience and education) preferred way.

The other bit of wisdom the painter gave me was that the best teacher (in determining your preferred way) is trial and error.  Now trial and error for the sake of trial an error is about as productive as packing your parachute without any training/research/practice.  The end result is likely about as satisfying.  But finding our 'preferred' ways of doing 'stuff' is how we amass competency--provided we don't kill ourselves acquiring it!


Bullseye!

No, I wasn't playing darts or shooting targets.  Rather, I was simply looking down at the site in which I had pulled a tick.  I new that the bullseye rash was serious and required a visit to the doctor.  I went yesterday, the day of discovering the tell-tale rash which appeared one day after pulling the tick.

Ticks and sticks!  That is where I live.

Daisey, part of our trio of dogs, presented on Friday with an open wound in her side.  It was quite breathtaking to view--a large torn flap of skin exposing the tissue below.  Thank goodness my regular vet was open.  I took here there within an hour of closing.  They were going to stitch her (requiring sedation) and keep her overnight.  Within one month, each of my dogs has required medical attention--and none of it inexpensive!  However, by avoiding the emergency vet, I saved quite a bit of money.  I'm grateful that my vet is open 7 days a week.  With Ella, I found her laceration of a couple of weeks ago, beyond their office hours.  She is now all healed up.

With Ella's injury and now Daisey's, it was important to determine just what was causing such injury.  With Daisey's, I'm attributing it to a plastic insulator that has been chewed up to the point where it is sharp and ragged.  It is exactly the height of her wound, and it is right in the area that Daisey chases the mail lady.  I'm betting that Macy was her companion (as the group does this daily chase in unison) and bumped her into the connector.

Ella's injury was in a different direction--it was more of a straight slice up and down, and still cannot account for the cause which is a worry.

Daisey looks like a Frankenstein dog with her very long stitch.  She's on strict immobility--so the retractable leash is as far as she can get from me, and I'm keeping her crated while inside to prevent jumping on furniture.  The stitch is in the middle of her torso, so not subject to so much pulling as Ella's incision.


At the FD job I worked with a couple of guys to get the laminate floor down in the basement. When I wasn't fetching materials for other pieces of the project, I was working side by side with them laying floor.  Once again, I'm reminded (because my body is screaming this message to me) that our body's are made to work.  Who needs the "Brazilian Butt" videos?  Simply lay some floor--I guarantee your butt will lift!

 I finished two of the partially unfinished rooms from Saturday.  Today should bring the final completion of the back room. Getting the floors done in the basement is a huge accomplishment.  I used a Pergo Elegant Expression Buchanan Maple (discontinued) that I purchased on closeout from Wood Floor Plus.  Since Mark and I did not do all of this install, the money I saved will go toward the installation price.  I'm good with that.  Sears is bringing the appliances today....