I went down there with Ella, who is proving to be quite a good companion. She loves to go to the property. I like an extra set of eye and ears. No power means no lights, so I am not doing any finish painting.
Yesterday I sanded and primed the kitchen cabinet bodies. The primer is Zinnser BIN, and it requires a good stir as the solids have settled. That brings me to today's MacGyver Tips and Tricks. This is a kitchen-crossover inspiration.
Stirring paint with flimsy paint sticks is not efficient. It occurred to me that an inexpensive whisk would be just the ticket. And......I also have a brush spinner....hmmm...
Let me just say, that this combination works very well for those who do not have a drill and a paint mixer bit. I do have a battery drill, and I really should get one of those paint mixers. For now, this combo works great. I sure love my brush spinner for its intended purpose--using centrifugal force to rid the brush of water/solvent to be stored way.
 Today I sanded the prime and put a first coat of paint on the cabinets. What a transformation from dark, dirty pine to creamy white. (I'll get pictures once I'm done). To say that this cabinet project is a big job (in addition to all of the other big jobs in the house) is an understatement. It is not really that many cabinets as you can see to the left. However, I'm being very careful with the prep, and my arms, hands and shoulders are a beneficiary of the sanding and painting. I have a feeling that after this project, I'm going to take a long hiatus from painting.
As I had to sand the primer (a step that cannot be skipped in my view) I was left with having to clean up without the benefit of power. I used a 4 inch paint brush (a cheap one with soft bristles) that had never been used. It did a beautiful job of cleaning up the first bit of debris to include stuff that accumulated in corners. I then followed up with mineral spirits. I used a clean paper towel wrapped around a staining pad. It resulted in less hand fatigue. Brushes came home to be cleaned with running water. I'm hoping that the power will be on Sunday.
Psychologically, the progress of completing a room is more compelling than completing a process (sanding all trim, priming all trim).....those discrete process pieces are so big, I don't feel like I really get through them all because there is no visual. The visual of a painted wall against crisply painted trim really does give one some sense of closure. When my cabinet project overwhelms me, I do look at the rooms upstairs. All that being said, efficaciously speaking, when your primer can is open, you really want to tackle all the priming. Putting a coat of paint on all of the wood is disclosing the promise of closure. I am
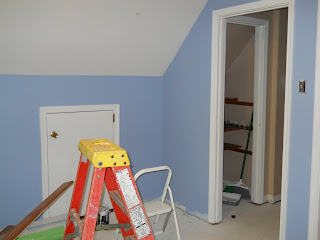
Here is my psychological oasis. I still need to put one more coat of paint on the trim. I found some trash in it (before I had my big lights), which I sanded out. I think that someone had the vacuum going while the paint was wet--there is no other explanation for the objects that I found in the paint. (Though I believe it may also be from the floor vents and the a/c coming on and circulating debris.)
We'll then lay the floor and put up the base trim (which is why you see that ragged edge). The trim is all part of the sand, prime, sand, paint process that is becoming physically and psychologically overwhelming. I know that products say that you don't have to sand before applications, however, if you want a beautiful finish on something that was not prepped well to begin with, best to prep it now.


0 comments:
Post a Comment